This guide will help you create a professional website for your hotel in just a few simple steps, without requiring advanced technical knowledge.
Discover how to choose the right templates, configure settings for the hotel or restaurant module, add custom pages, and integrate essential features such as social media links, interactive maps, and digital menus. With this guide, you’ll have a fully functional website ready to be published on your own domain.
The Hotel Website Builder is included in all our packages. Click here to see what your site could look like.
Follow the detailed steps below to get started!
Select and Complete the Required Information
- Navigate to Menu > Booking Engine.
- Go to the Your Website section in the left-hand menu.
- Complete the following information for the hotel module:
- Template: Select the most suitable template for your property.
Once you’ve decided, save the changes! - Footer Links: Decide whether you want to display the standard footer link for ANPC or another predefined link.
Click the Add Link button to add a new link. Fill in the Title, URL, and Image fields.
Once all the information is completed, save the changes! - General Information: Choose the default language and available languages for the website display. Add your Google key to include a map on the website or the Open Weather key.
Once all the information is completed, save the changes! - Custom Pages: Add pages dedicated to conference rooms, local attractions, check-in rules, and more.
Click Add Page and fill in the details.
Once all the information is completed, save the changes! - Social Links: Add shortcuts to your Facebook, Instagram, Twitter, or YouTube pages.
📌 Note: Configuring the Property in the Booking Engine is documented in the Support Center section under "Booking Engine."
For the Restaurant Module, Complete the Following:
- Digital Menu for the Restaurant: The restaurant menu page is automatically published after uploading the menu with photos and prices in the POS - Menu section. Check the dedicated Restaurant Manual in the Support Center under the "Online Menu" subsection.
- Delivery: To enable the food order feature on the website, set it up in POS Restaurant, under Settings > Delivery. Refer to the Restaurant Manual in the Support Center under the "Delivery Settings" subsection.
❗ Verify the Settings: Go to Home and click View Your Website to ensure everything is in order.
Download and Upload Your Website to Your Domain
- Click Automatic Installation and download the website script as a Zip archive.
- Upload the archive to your website. If you’re using cPanel, upload the archive to the public_html folder and click Extract. If you’re not using cPanel, extract the archive in the root directory of your domain.
✅ Done! You’ve added the information for this section!
Frequently Asked Questions (FAQ)
❓ Q: How can I make changes to the website template?
Answer:
If you have web programming knowledge or a dedicated person for such tasks, changes can be made directly in the website’s source code. Access to the source code is available via cPanel.
Using this method, you can customize the website template, including positioning elements such as the check-in buttons or the "Rooms & Suites" button. This way, you have full control over the site’s design and functionality.
❓ Q: How do I add Custom Pages?
Answer:
To add Custom Pages, follow these steps:
- Go to the Custom Pages section under Your Website.
- Click the Add Page button and select where you want the new page to appear (Main Menu or Footer).
- Add the title and content of the page, then save the information.
❓ Q: How do I add the Netopia logo to the website?
Answer:
If you’re working with the Netopia payment processor, they require their logo to appear on your website.
To do this, follow these steps:
- Click Custom Links.
- Click Add Link.
- Name the link "Netopia" in the Title field.
- Add
https://netopia-payments.com/in the URL field. - Save the image below to your computer and add it by clicking Choose File.

📌 Note: You can use the same steps if you want to add another payment processor logo under the Custom Links section.
❓ Q: How can I generate an API key for maps?
Answer:
If you are using the free website provided by Pynbooking, you’ll need a generated key to use Google Maps services.
Follow these steps:
- Create a new account or log into your existing Google account at Google Cloud Maps Platform.
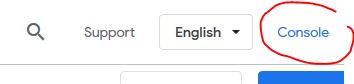
- Click the Console button in the top-right corner of the screen.
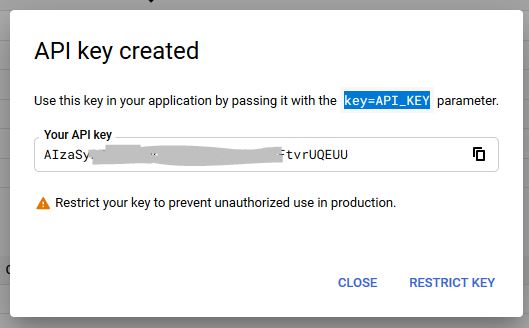
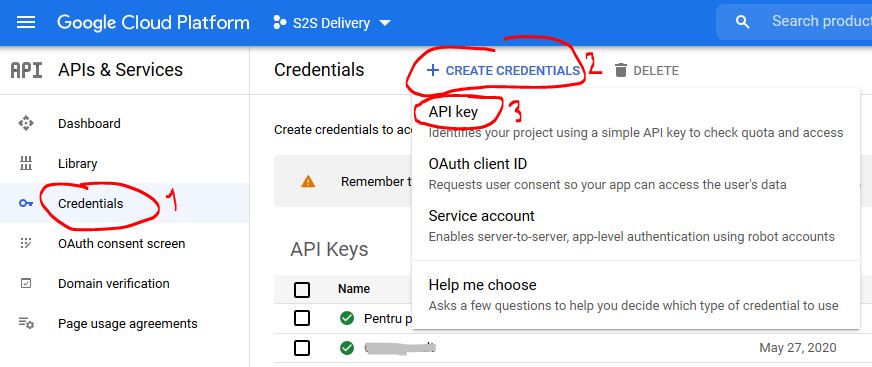
❗ If you don’t have a project, create one. Choose credentials and add an API key.
The key will be generated automatically.