
The Cash Register is the financial module where you record and track all cash operations of the hotel: receipts, payments, payment orders and receipt orders. You use it daily to maintain a record of the cash desk balance, generate fiscal documents (automatically numbered orders) and close the accounting day. It solves the problem of maintaining a manual cash register and eliminates balance calculation errors.
How to use it:
Access Financial → Cash Register from the menu. The page displays four indicators in the main header: Current Balance (the balance of the active cash desk), Last Day Closed, Selected Period and Day Status (Open / Closed). If the day status is Open, you can add new operations.
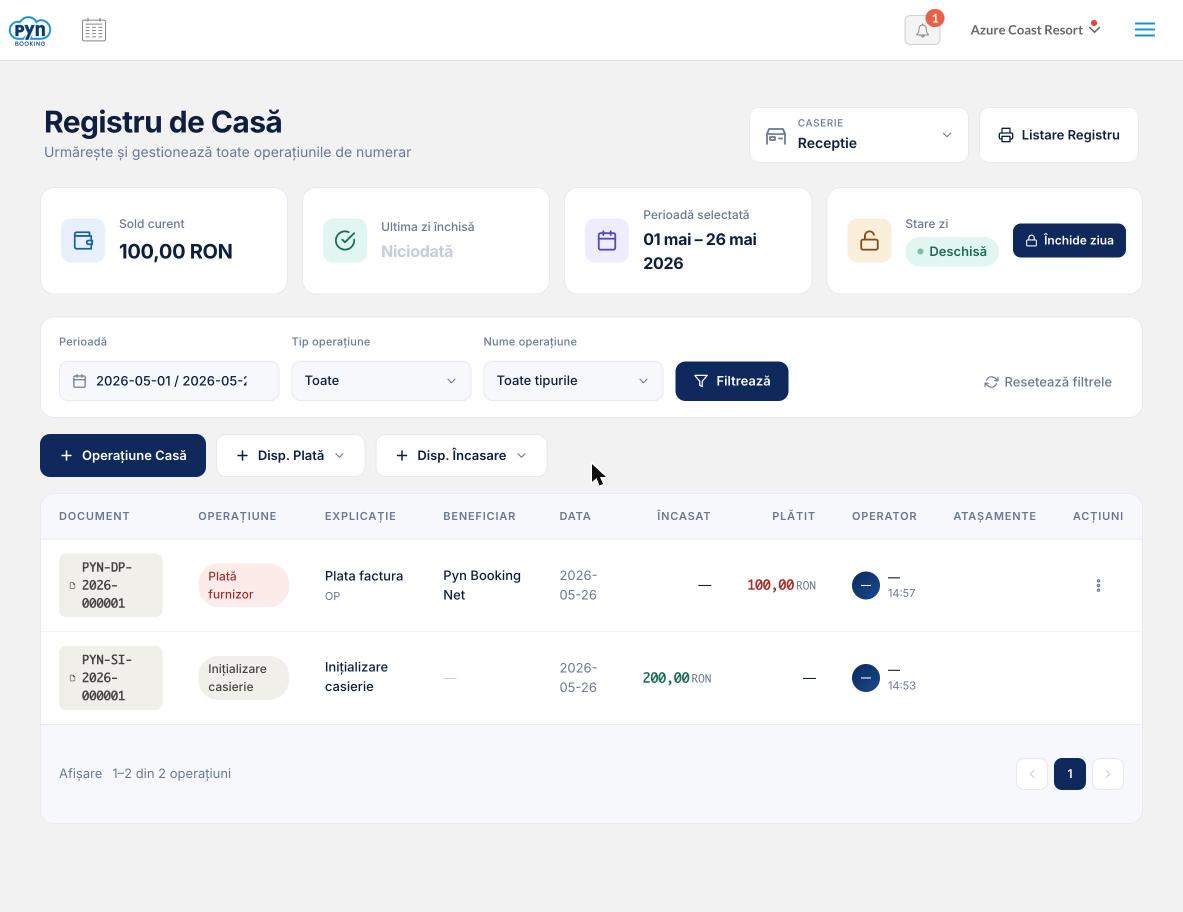
If you have multiple cash desks (e.g. Reception, Restaurant, Bar), select the desired cash desk from the CASH DESK dropdown in the top right. You can add a new cash desk directly from the same dropdown by clicking + Add Cash Desk — a form opens where you enter the Name, Document Series and optional Initial Balance.
Filter operations in the table by Period (custom dates), Operation Type (All / Receipt / Payment) and Operation Name (Cash Desk Initialization, Z Report, Bank Withdrawal, Other Receipts, Supplier Payment, Client Refund, Bank Deposit, Other Payments, Inventory Difference, Correction). Click Filter to apply, or Reset Filters to return to the full list.
The table displays for each operation: the document number (e.g. PYN-DP-2026-000001), the operation type, the description, the beneficiary, the date, the amount received or paid, the operator and the number of attachments.
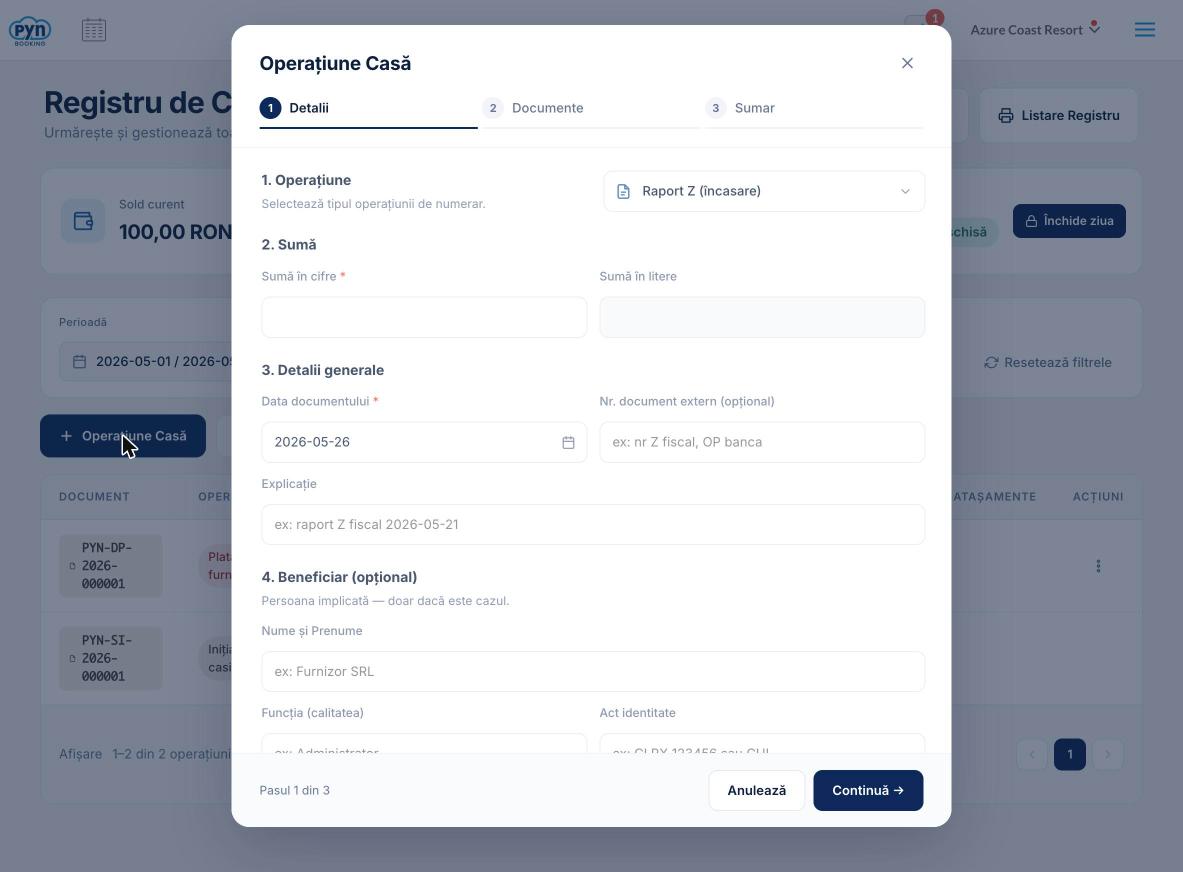
Add Cash Operation (internal entries: Z Report, Balance Correction, Cash Desk Difference) — click the + Cash Operation button. The form has 3 steps: 1. Details — you choose the type (Z Report, Balance Correction +/−, Cash Desk Difference +/−), you enter the amount in figures (the amount in words is completed automatically), the document date, optional external document number, description and optional beneficiary. 2. Documents — you attach supporting files (PDF, JPG, PNG, max 10 MB/file). 3. Summary — you verify all data and click Save.
Payment Order (supplier payment, client refund, bank deposit, other payments) — click the + Payment Order button. The form has 3 steps: 1. Details — you choose the payment type, you enter the amount, date, optional external reference, the order number (automatically pre-filled when saved), the purpose of payment and beneficiary data (Name, Function, Identity Document). 2. Documents — you attach supporting documents. 3. Summary — you verify and click Confirm and Generate. The document is automatically numbered (e.g. PYN-DP-2026-000002) and recorded in the register.

Receipt Order (other receipts, bank cash withdrawal) — click the + Receipt Order button. The structure is similar to the Payment Order, but the beneficiary field is called Payer (the person from whom the cash is received). The document number is automatically generated with the PYN-DI prefix.
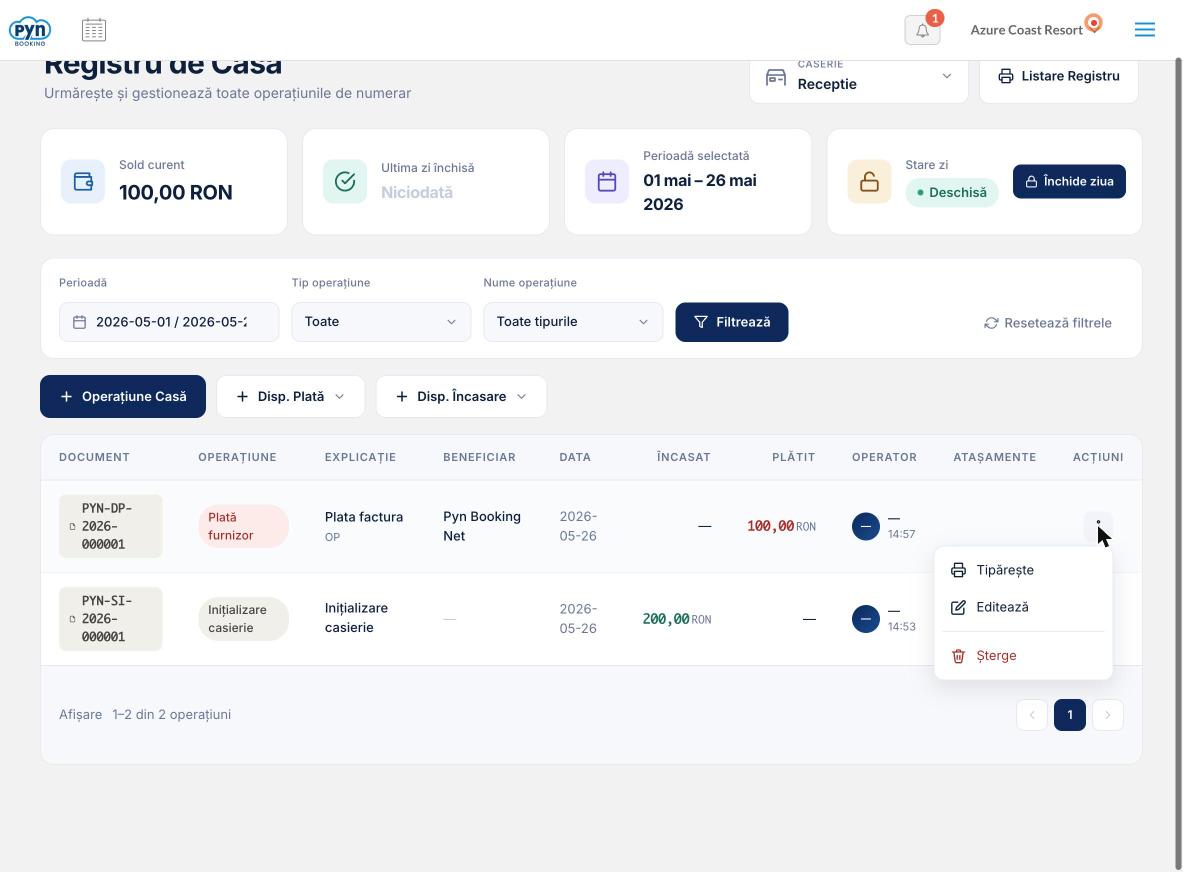
For any operation in the table, click the three dots (⋮) button in the Actions column to access: Print — opens the document in printable format, Edit — you modify the operation data, Delete — you delete the operation (balances are recalculated automatically, the sequence number is freed).
The Register Listing button in the top right generates a printed report of the cash register for a selected period. You select the start and end date and click Generate Listing.
The Close Day button locks all operations on the selected date and earlier, making them read-only. You specify the closure date, an optional note, check the confirmation and click Close Day. This action cannot be undone.
